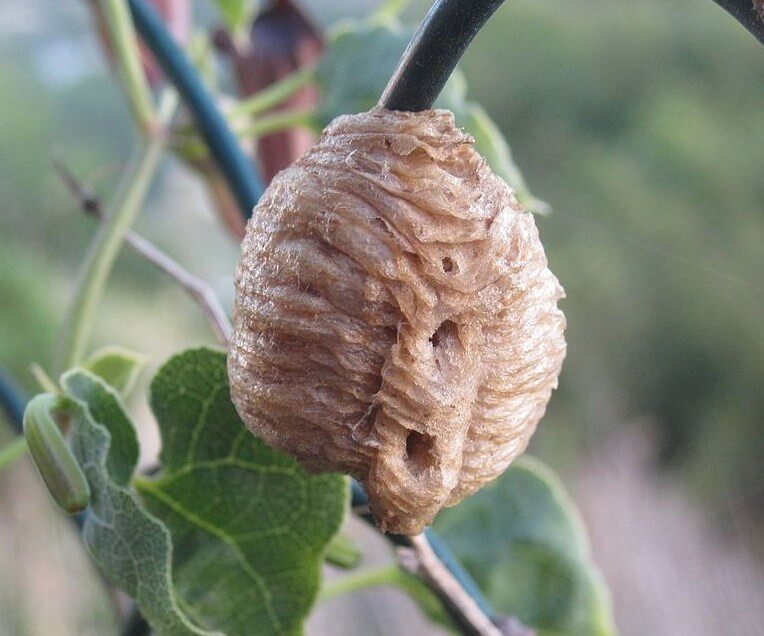
The eggs of a praying mantis are enclosed in a foamy nest called an ootheca. The term comes from the ancient Greek and means a place for storage. The German terms are foam nest or cocoon. Females like to lay their foam nests on branches or smooth surfaces. When the female produces the ootheca, it is soft, but it dries quickly to become firm and hard. The ootheca has the task of protecting the eggs until they hatch.
The eggs are laid regardless of whether successful mating has taken place. Unfertilized females also build oothecae from which no hatching occurs. Each species of mantid has a different color, size and shape of ootheca. An ootheca consists of a more or less thick outer protective shell, which can look like mounting foam and provides insulation against heat and cold. Some have only a few eggs inside, other species can have hundreds of mantid eggs in just one foam nest.
Most Mantis species that originate from temperate zones lay their ootheca in the fall, shortly before all mantids die. Ootheca building usually takes place under the cover of twilight. The eggs in the ootheca will remain dormant until spring, when the nymphs will hatch and grow up. Then the cycle starts all over again.
When the female produces an ootheca, you should make sure that she is not disturbed. About 3 – 5 days after she lays the ootheca, it will have hardened enough to be removed from the female’s insectary. I recommend removing them because the nymphs require a different environment than the adult mantid. The female will also eat the nymphs if she is housed with them.
I place the foam nest in a separate container that is larger than 15 cm high and wider than 8 cm, simply to ensure that there is enough space for the nymphs when they hatch. Of course there are very small species that require less space, but in general these dimensions are suitable for all species. For hatching, there should be 5 to 10 cm of space at the bottom, as the larvae will shed their skin for the first time directly after hatching on a thread.
The container should have plenty of ventilation, either through a net or by punching holes in the plastic container. I always put a pair of tights over the lid.
I place the ootheca on the inside of the lid of the container. The orientation should be the same as the female has placed it! You can attach the ootheca with double-sided adhesive tape. Make sure that all of the tape is covered, as any left over will kill nymphs if they walk on it. You can also use a needle to attach the ootheca, but only push the needle through a part of the ootheca where there are no eggs. This is usually the outer edge of the cocoon. It is easiest if the ootheca is attached to a branch, then I cut off the piece of branch and separate it.
Some oothecae require dormancy, tropical species do not. A diapause or dormancy is a pause in development during the winter months, so it is possible that the mantids will produce their eggs in the fall and the nymphs will not hatch until spring. At low temperatures the development of the eggs is paused, again higher temperatures will trigger the development. Species that have a diapause in nature, for example the European mantid (Mantis religiosa), must also have this pause in captivity. These oothecae should therefore be kept in a cooler environment at approx. 12 – 15 degrees Celsius for at least 8 weeks. As tropical mantid species do not experience seasons in the wild, they do not need a diapause.
To successfully incubate the mantid eggs, you need to keep the humidity and temperature in the container at the right level for your species. You can find this information in the species descriptions section of my blog. You can keep the humidity high by adding substrate to the bottom of the container. Good substrates are paper, vermiculite, cloth, clay granules, white sand or very small pebbles. I have had very good experiences with clay granules and a few oven fish so that nothing gets moldy.
As soon as the nymphs hatch, they must be transferred to a suitable container for rearing. More on this next time.
Did you like the article?
Like Insektenliebe on Facebook!

Leave a Reply
You must be logged in to post a comment.